
THe dirtwork Diary of a new home Build in Alaska.
Follow along through the steps and stages of building a new home in Homer, Alaska. We set out to show how our materials are used in the construction process all the way from a raw piece of land to finish grading the lawn.
Of course, every project is unique but hopefully this gives you a good visual journal of a typical build around our neighborhood. The dirt work was done by Johnson & Sons for Big Mountain Builders in Homer, Alaska.
Building the Driveway.
First step is developing access from the existing roadway to the building site. In this case the house was to be built at the end of about a 100’ driveway connecting to a minimally developed gravel road. Like most cities, Homer has specific requirements for building an access to their roadways.
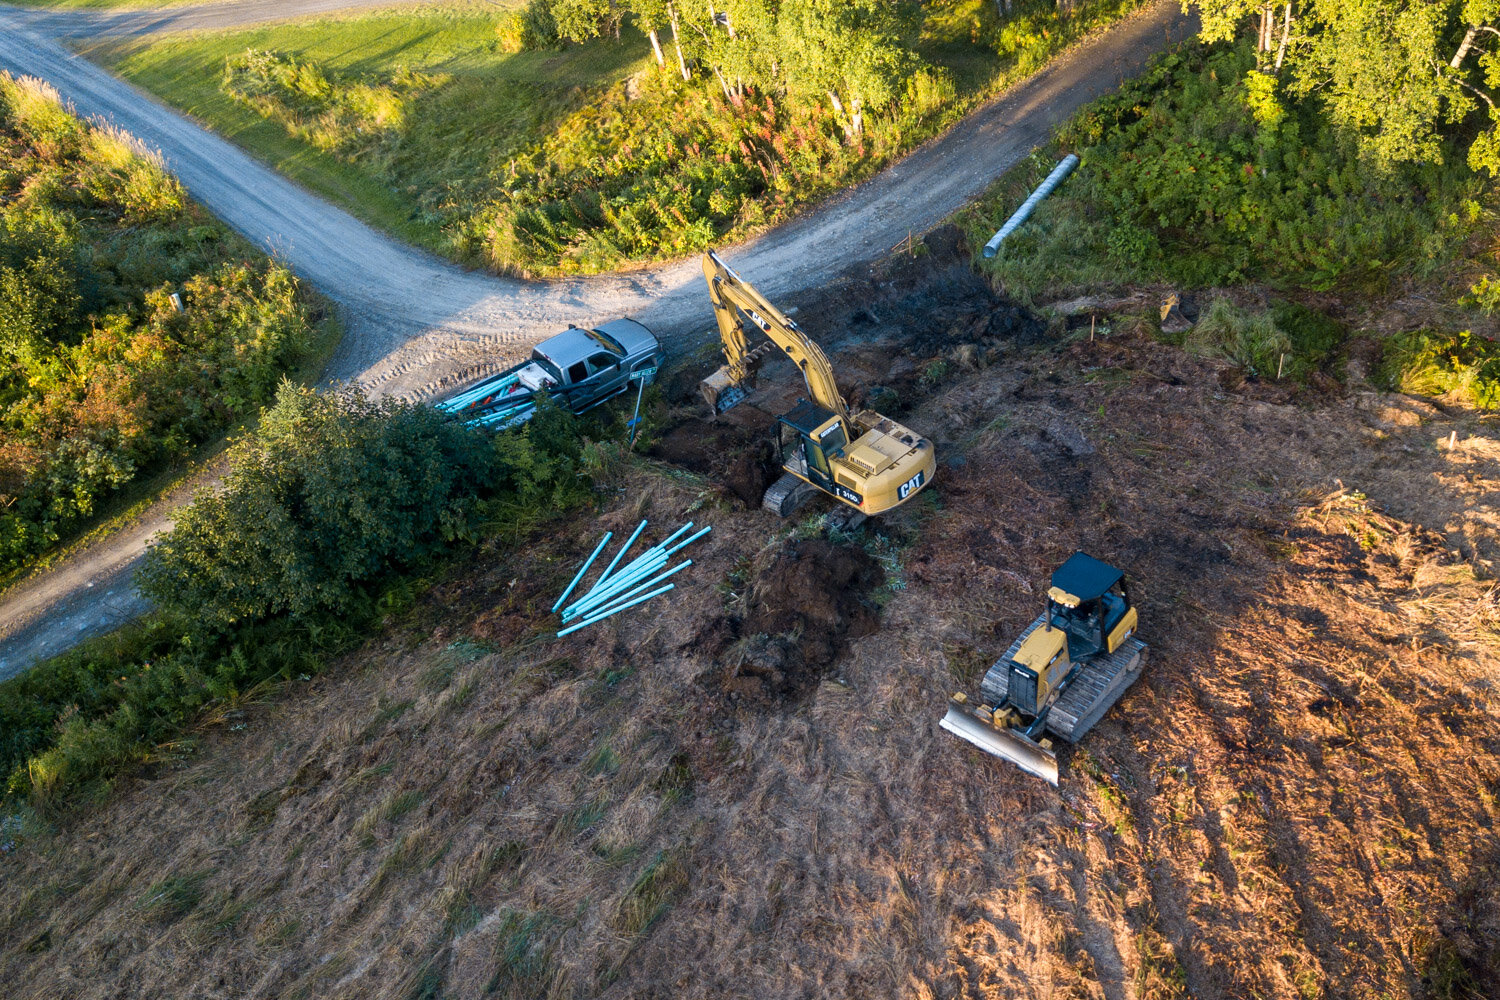
breaking ground
Once the access point for the roadway was determined the digging began.

Trench for Culvert
The culvert needs to allow any water runoff from the ditches and adjacent land to travel freely under the new driveway. A trench was dug slightly below the required level and then smoothed off and packed with 1 1/2” Minus gravel to make a solid bed for the culvert to lay in.

Setting Culvert
Once the grade was dialed in and a smooth firm bed formed road fabric was spread out before the culvert was positioned. The road fabric provides a water permeable separation between the soil and gravel products. It’s particularly helpful in the spring time when mud starts to flow during breakup.

Bedding Culvert
1 1/2” Minus gravel was filled in around the culvert. This material compacts well and creates a very solid surrounding which prevents damage to the culvert. When building up road base like this it’s best practice to compact between every 6” of material added to ensure there are no hidden voids.

Driveway stubbed in
More 1 1/2” Minus gravel was used to reach desired grade for the beginning of the driveway. A small dozer spread the dump truck loads.

staking the driveway
With the culvert and stub in the next step was staking out the exact path and grade for the driveway leading to the parking area and house. It’s important to figure in the elevations at this point to avoid any unnecessary steps or drainage issues at the house.

Clearing and sculpting
The path for the driveway was set, next step was scraping off the topsoil with the organic matter and establishing the surface drainage. On this gently sloped lot they needed to prevent pooling water on the uphill side of the driveway by cutting a ditch that would carry water away from the driveway.

Excavating to solid ground
We all know gravel makes for a better road than dirt. Not all dirt is the same however, and it’s often a good idea to dig away the soft topsoil layers to reveal more solid ground beneath to build upon. The use of road fabric also creates a water permeable barrier to keep mud from contaminating your nice solid gravel over time - and especially during breakup season in Alaska.

Bring in the gravel!
With a smooth firm surface and surface drainage established it was time to roll out the road fabric and bring in the truck loads of gravel - 1 1/2” Minus makes a great road bed that compacts nicely and spreads easily. About 8-12 inches of 1 1/2” minus makes for an adequate private driveway in most situations. Road fabric is available locally in 12’ and 17’ wide rolls.
Excavating the foundation
With the driveway well underway it was time to start exacavating the building foundation site. This two story home was being constructed on a relatively dry gently sloped lot and would feature a walkout basement and a main level slightly above grade.

Digging the basement
With the home build location marked the crew began roughing out the basement with the excavator.

Fine Tuning the excavation
The grade was checked and double checked to confirm the right depth was reached to allow for the drainage, footers, walls, etc and arrive at the desired level for the walkout basement and close to ground level second story.

Spreading Fabric
With the excavation complete it was time to spread geotextile fabric. This material allows water to move through but seperates the soil and mud from the sand and drain rock soon to come.
Foundation Drainage
A well built house provides shelter from the elements. One of the most troubling elements for your foundation is water. Quality gravel materials and a well designed drainage system can give you peace of mind and trouble free protection for generations.

Backfilling
The foundation was excavated, geotextile fabric laid on the bottom and drainage fabric staked up along the basement walls. Drain tile piping was installed around the perimeter of the foundation with cleanouts and gutter downspout inlets pipes at key locations. In the photo above the backfilling with sand is just getting started.

Drain Tile
It’s critical that any water that reaches the foundation and basement walls is given an easy path away from the building. This is achieved with perforated drain tile pipe surrounded by washed drain rock, sand, and drain fabric. This combination of materials filters the soil out of the water to prevent clogging the drain pipes but still allows the water to flow easily away from the building.

Compacting the sand
Compacted sand makes a great base beneath concrete slabs and footers. It’s easy to smooth and does not hold water. These characteristics make it a popular choice for backfilling beneath foundations.
Building the Foundation
Foundations can be constructed a number of ways. Here you will see the process for a top notch home build on a gently sloped lot with a walkout basement. The site was excavated and foundation drainage installed around the perimeter prior to this stage. Sand backfill was placed and compacted in preparation for concrete footers and a basement slab.

Footer Forms
Building atop the compacted sand backfill, forms for the concrete footers were constructed around the perimeter of the home. Steel rebar is suspended in the footer forms and they are ready for concrete.

Concrete Footer Pour
Our Aerial Concrete Pumping Service makes concrete pours fast and efficient. With the boom reaching all around the entire foundation with ease it only took about 30 minutes to pour all the footers. For most residential foundation footers and sono tubes 5.5 sack ready mix concrete is ideal. We deliver concrete by mixer trucks with or without the aerial pumping service.

Insulated Concrete Forms
The day after the footers were poured the crew stripped the form boards and built up the double insulated concrete forms for all below grade walls. These ‘ICF’ walls are reinforced with steel rebar and go together very quickly. They have become popular in Alaska for good reason. This project used Fox Blocks brand forms.

Pouring the Walls
Two days after the concrete footers were poured our Aerial Concrete Pump truck was back. This time pumping 6 sack grout ready mix concrete which is specially formulated for use in walls - either insulated foam or concrete block style. The grout mix has smaller aggregate to help it flow and settle into the confined spaced optimally.

Concrete Footers & Walls
Two days after pouring the insulated concrete formed walls were firm enough to strip the bracing and form boards away.

foundation waterproofing
A waterproof membrane was applied to the outside of the foundation walls and over the footer as well. This prevents any possibility of water seepage through the foundation. You can also see the drain tile stubs and 1 1/2” drain rock surrounding the foundation. The pinned up septic fabric was eventually folded over to cover the drain rock before backfilling with dirt.

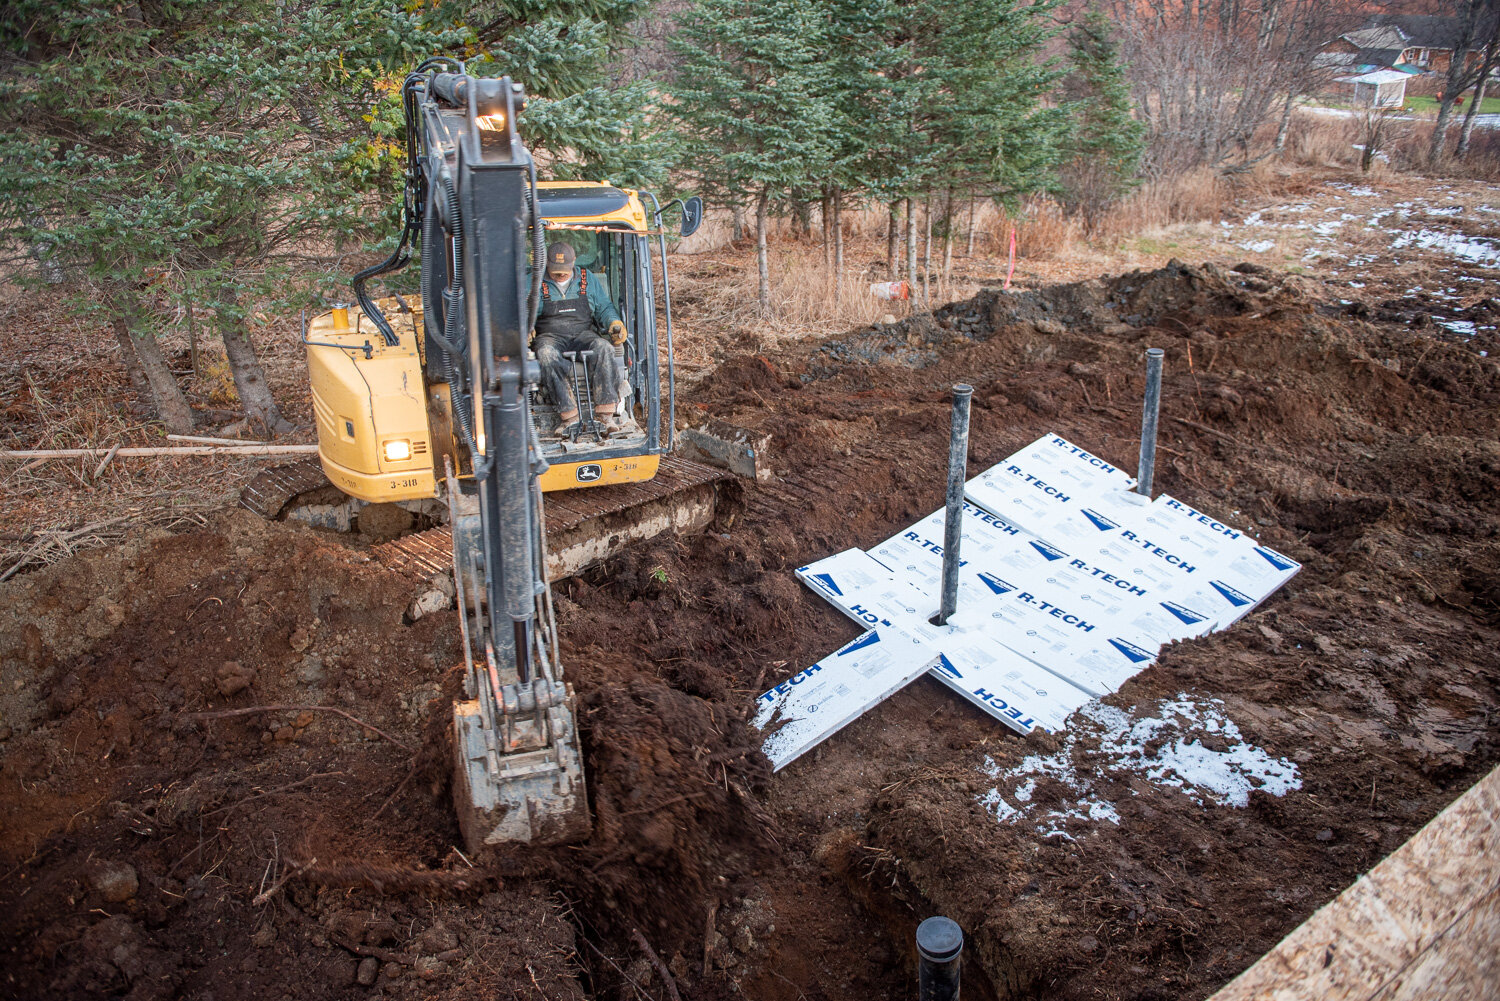
Concrete slab prep
Foundation footers and walls done, it was time to prepare for pouring the concrete slab for the basement floor. Sand makes a great fill for this purpose. It compacts well, drains water, and is very easy to flatten and work with for installing the plumbing pipes required below the slab.

pouring the slab
In Alaska it’s standard practice to lay down foam insulation below a slab to keep the cold earth from chilling your slab year round. For most homeowner slabs our 5.5 Sack Ready Mix Concrete is a popular choice. It can be reinforced with fiber or steel mesh. We also have additives to help the concrete cure in cold temperatures. The weather was well below freezing for this pour and it worked out great. Our aerial pump truck service makes the go very quickly and minimizes the back breaking work involved in concrete work.

backfilling foundation walls
With the concrete foundation walls and slab poured and cured it was time to backfill around the walls. The drainage pipes were allready set in place with gutter connections and clean outs. Drain rock surrounds the drain tiles and it is all wrapped in septic fabric to keep dirt from infiltrating over time. The first layer covering the drainage is sand and then dirt on the surface.
Septic System
If you are building on a lot that has city water and sewer service, or going homestead style with a dry cabin and outhouse you can skip this step of the build. For many construction locations in Alaska a new home will require a septic tank and drain field. Before a drain field is constructed, it needs to be determined to have the absorption capacity required. This calls for percolation tests to determine whether the absorption rate is acceptable. The results of these tests will determine how your septic system should be designed. Here’s how they did it on this project.

Placing the Septic tank
Every septic system is customized for the soil conditions, topography, number of bedrooms, etc. Here the tank was set about 10ft from the house and connected to the plumbing drain pipe exiting below the foundation.
Burying the septic Tank
The septic tank and incoming drain pipe were buried in soil and covered with insulation to protect from winter freeze penetrating down into the septic system.

Excavating the Leach Field
Based on the custom septic design the fluids leaving tank will flow at a gentle slope through drain piping to the drain field. The effluent is then evenly distributed over the leach area which is specially designed for purposes of effluent or wastewater filtration and absorption.

Building the drain field
A septic drain field, also called a leach field, evenly distributes the fluids out of your sewage into the natural groundwater. Pipes with small holes are surrounded by washed drain rock to maximize surface area for effective absorption.

Insulating the drain field
Depending on the depth of your drain field you’ll likely want it to be insulated from above to keep the fluids flowing year round. Here the system is covered with septic fabric to keep out dirt infiltration then 2” foam was laid out before backfilling.
Finishing the Dirtwork

Pause in the dirtwork
While the framing crew built the house the dirtwork was paused which is typical. Here the roof trusses are being craned onto the building.
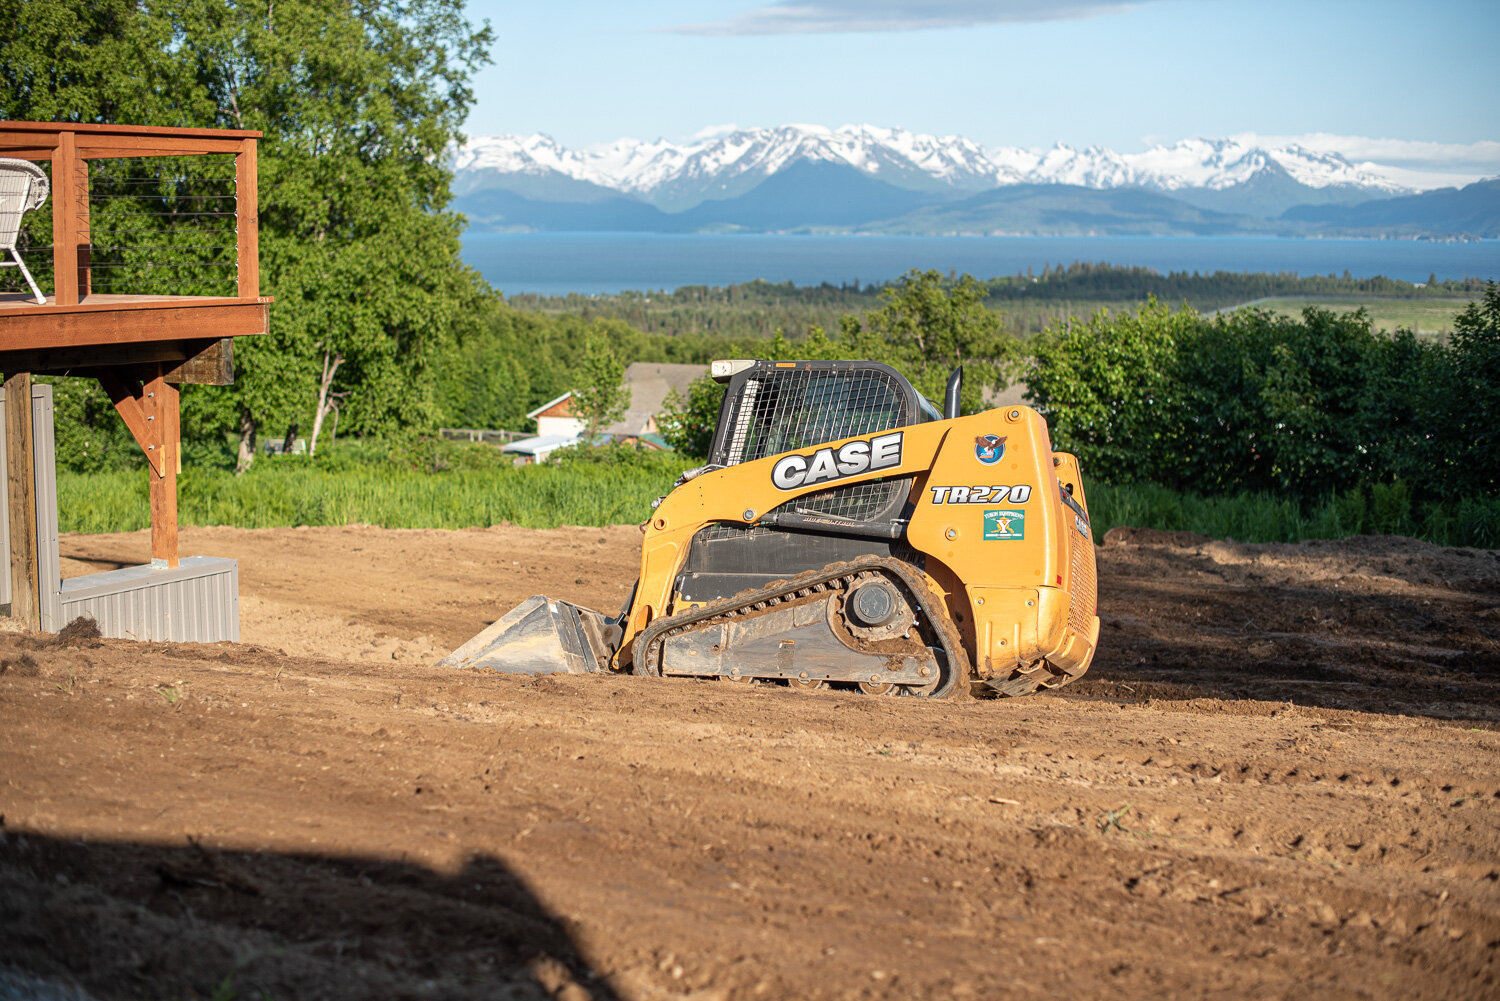
prepping the lawn
This home was built in the late fall through early winter. The lawn area was left rough for the winter and after spring breakup the area was tilled and smoothed in preparation for planting a lawn. Depending on the existing soil on the project site and how the excavation process went there might be enough topsoil available on site. We blend a premium topsoil product for building lawns and gardens where clay or other infertile soil dominates.

Landscaping
As every homeowner knows the project never completely ends - there is always finishing touches and improvements. We offer a diverse selection of landscaping products from precast concrete, large rocks, washed rock, blended topsoil etc. to help you take your landscaping as far as you’d like to go!